01Guide 1 of 4
Set up a project and a mailbox
A project holds one brand: its offer, its audience, its material and the mailboxes it sends from. Set up one project and one mailbox before you add any companies.
About 5 minutes · 4 steps · Screenshots from an example workspace with fictional companies
Before you start
- Your offer in a few lines, and the kind of business it is for
- The SMTP and IMAP details of one mailbox (an app password for Google Workspace or Microsoft 365)
- Access to your domain's DNS, in case a check fails
Step 1: Create a project for one brand
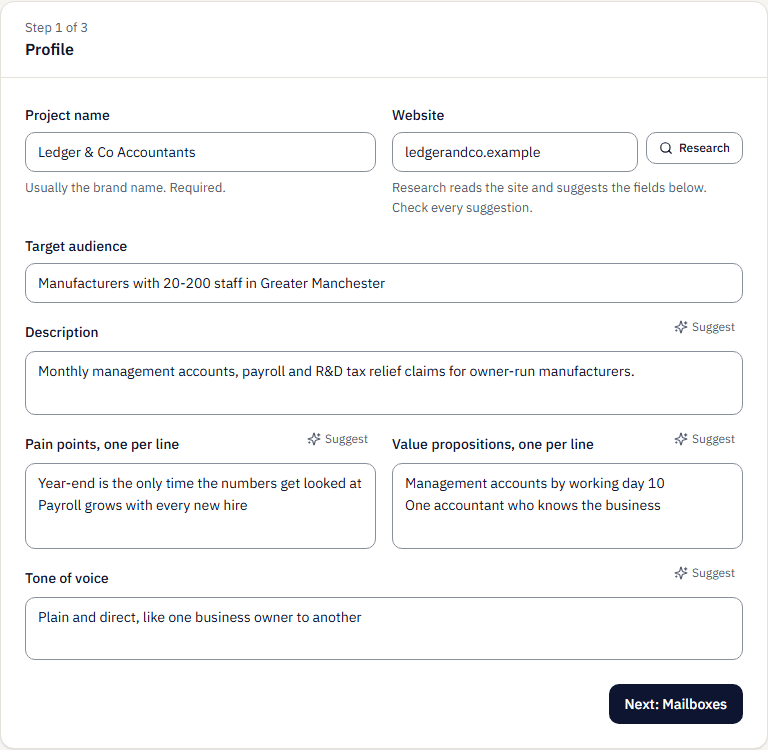
Open Projects and choose New project. The profile asks for the brand name, the audience you want to reach, what you sell and to whom, the problems you solve, why it matters to a customer and your tone of voice.
Describe one offer for one kind of business in one market. "Payroll for small manufacturers in Greater Manchester" gives the drafts a clearer angle than "all small businesses". If you add the website, Research can suggest the fields. Check every suggestion before you keep it.
Worth knowing: A project keeps work organised. It is not a client login: everyone in your organisation can open every project.
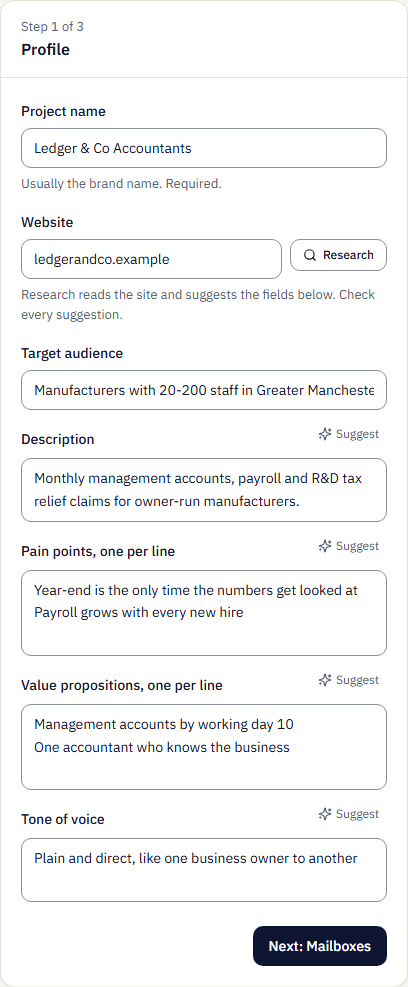
Example workspace. Step 1 of New project. Only the profile is required; mailboxes and saved searches can follow later.Open full size (opens in a new tab) Step 2: Write down what you can prove, and what you must not claim
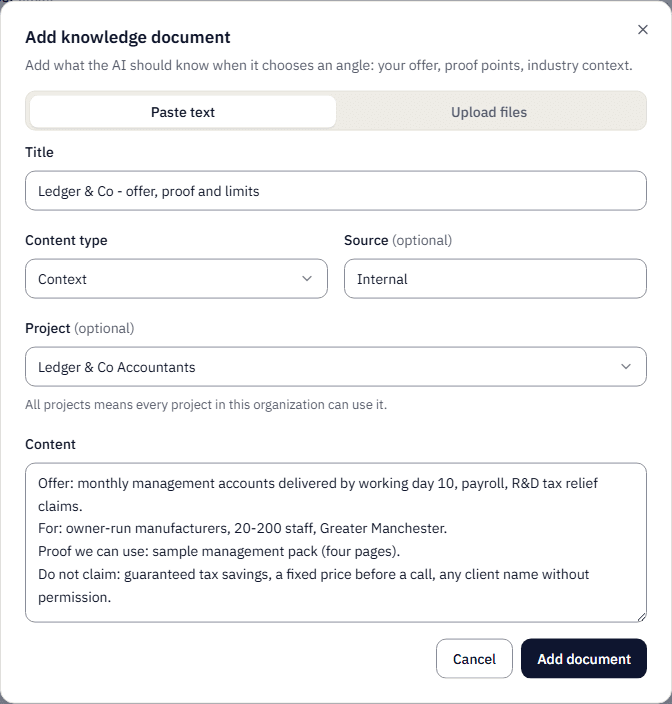
Open Knowledge and add a document for the project: your offer, the customers it suits, the proof you are allowed to use and the claims to avoid. Paste text or upload files.
The AI consults these documents when it chooses the angle for a lead's emails, and it uses the closest few matches, not every document. Short, current documents work better than a pile of old ones.
Worth knowing: A note in Knowledge guides the angle. It does not stop a claim from appearing in a draft, so you still read every email before approving it.
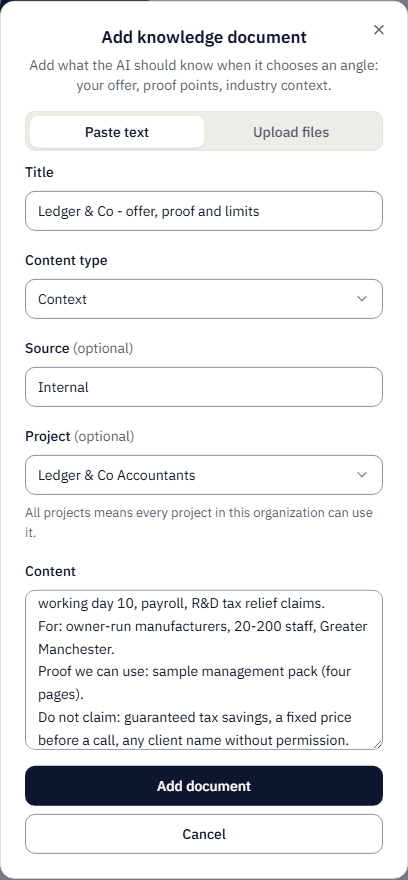
Example workspace. A knowledge document for one project, written as offer, audience, proof and limits.Open full size (opens in a new tab) Step 3: Connect the mailbox your prospects should hear from
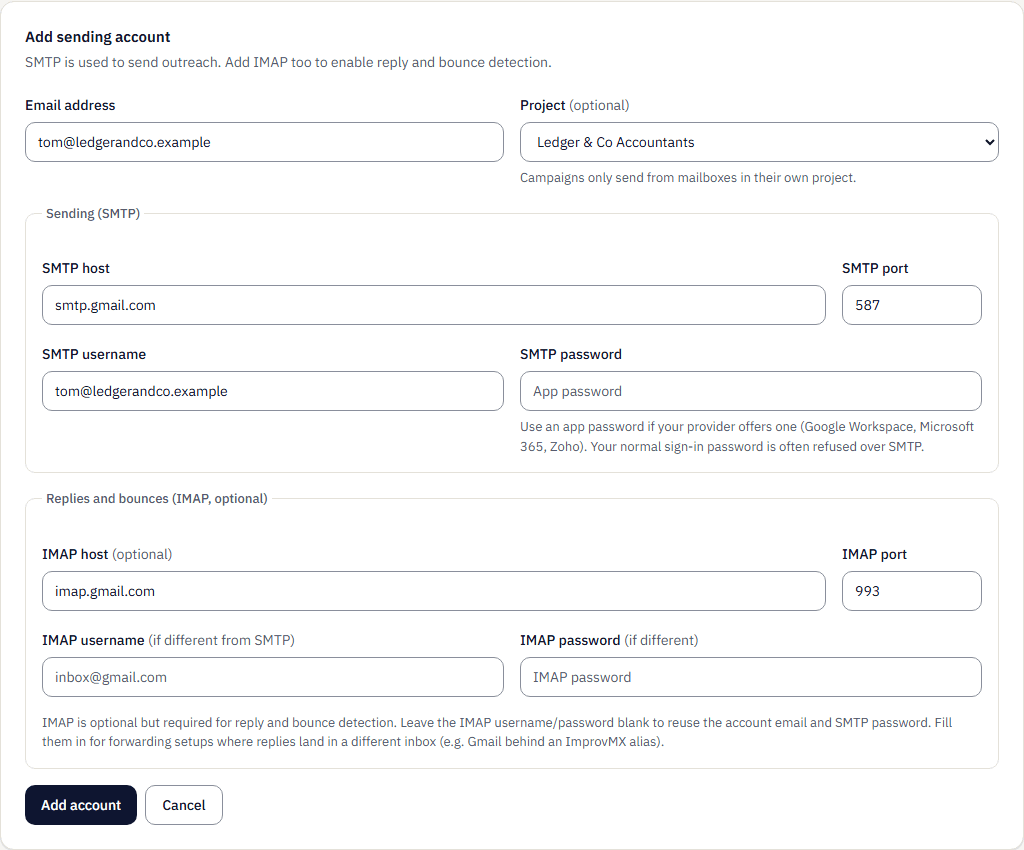
In Settings, open Email accounts and choose Add account. SMTP sends your email. IMAP lets MyLeadTeam read replies and bounces, so fill in both: without IMAP, replies and bounces are not picked up.
Google Workspace and Microsoft 365 connect the same way, over SMTP and IMAP with an app password. There is no Google or Microsoft sign-in button. Pick the project: campaigns only send from mailboxes in their own project.
Once the account is saved, use Test on its row. It checks the SMTP login, the IMAP login when IMAP is set, and shows the SPF, DKIM and DMARC result.
Worth knowing: Passwords are stored encrypted. Never send a mailbox password to support; describe the error you see instead.
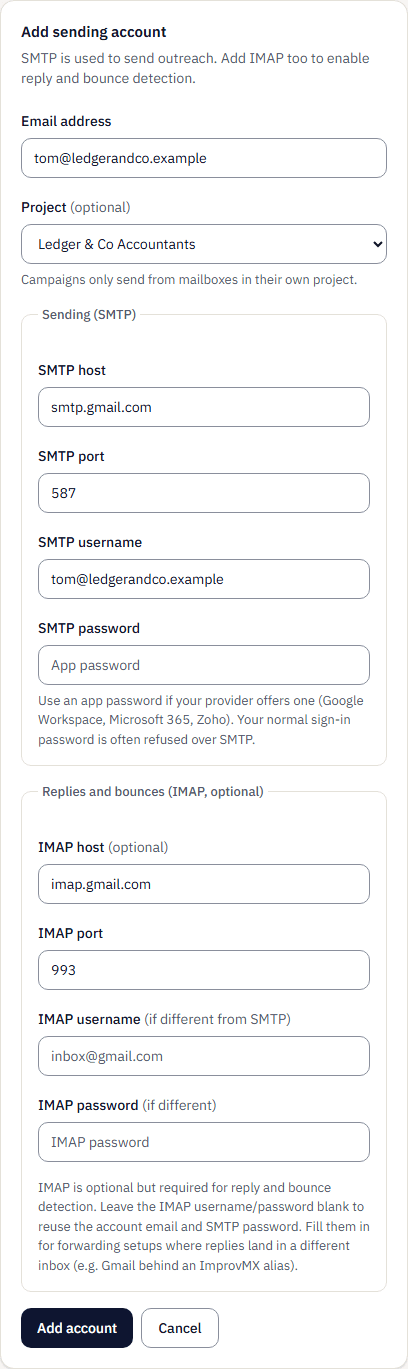
Example workspace. Add account under Settings, Email accounts. The password field asks for an app password.Open full size (opens in a new tab) Step 4: Read the mailbox's limits on Mailboxes
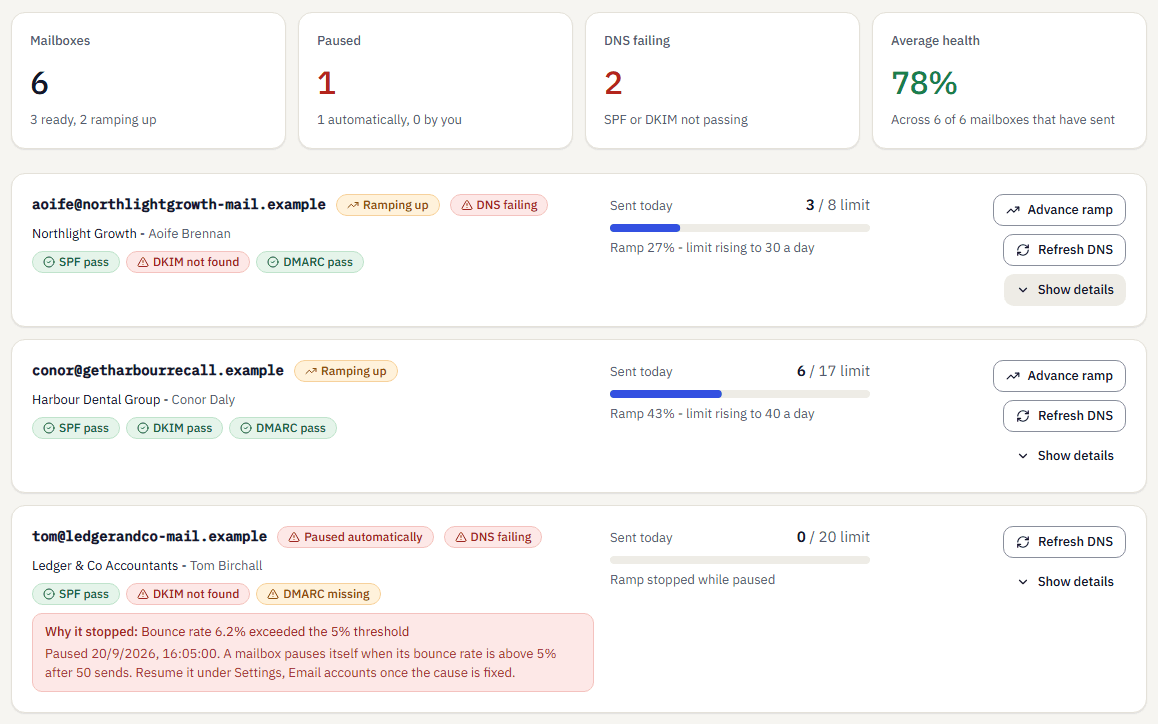
Mailboxes shows each mailbox's status, today's sends against its daily limit, and its SPF, DKIM and DMARC checks. If a check fails, fix it in your DNS before your first campaign, then use Refresh DNS.
A new mailbox starts on a ramp: 10 emails a day, rising by 5 a day towards its limit (30 unless you change it). A mailbox pauses itself when its bounce rate reaches 5% or more after 50 sends. The card then says why it stopped, and you resume it under Settings, Email accounts once the cause is fixed.
Worth knowing: The ramp is a daily limit on your own mailbox, not a warmup network, and a connected mailbox is not a promise of inbox placement. Resuming a paused mailbox currently starts its ramp again.
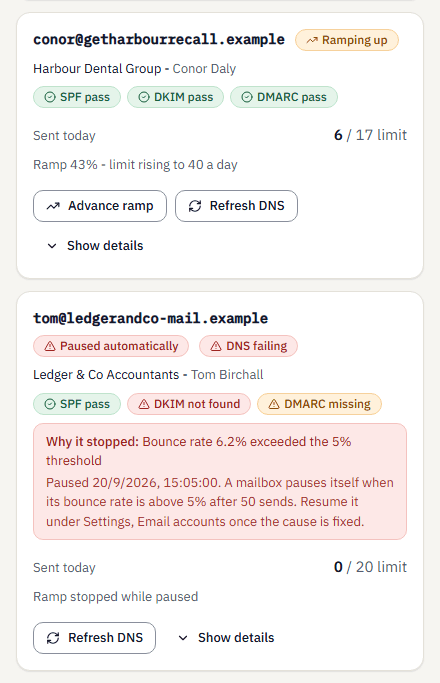
Example workspace. Mailboxes with two mailboxes on the ramp and one paused automatically, with the reason.Open full size (opens in a new tab)
Next guide, 2 of 4
Add companies and check the research
Find companies by kind of business and area or import a CSV, check each address status, and read what the company publishes apart from the AI's reading.
Stuck on a step? Tell us the screen and the message you see. Never include a password.
Ask a question