02Guide 2 of 4
Add companies and check the research
Start with a list small enough to read one company at a time. Find companies or import your own, then check each address and what research found before anything is written.
About 5 minutes · 4 steps · Screenshots from an example workspace with fictional companies
Before you start
- A project (see the first guide)
- A kind of business and an area, or a CSV file with an email column
Step 1: Find companies by kind of business and area
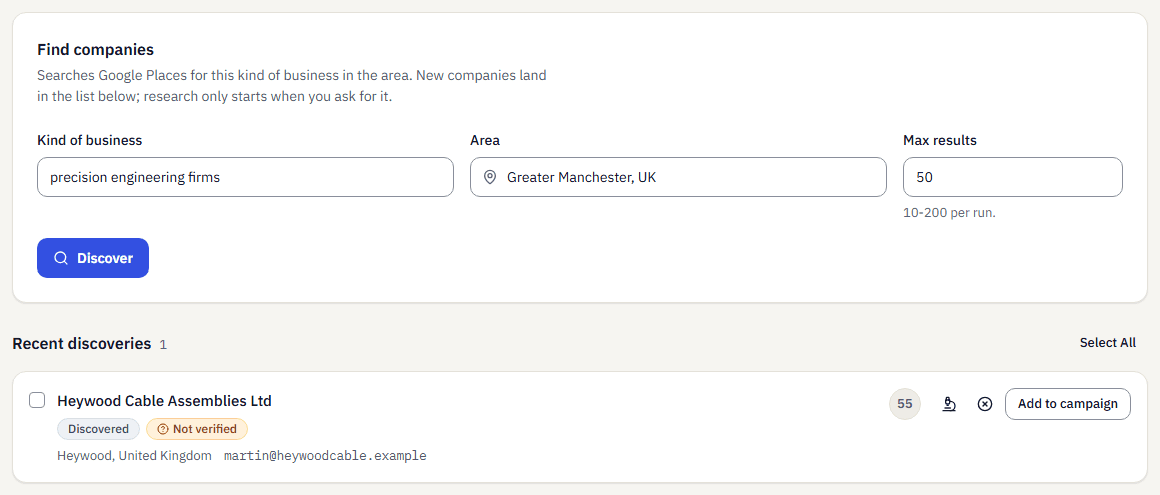
On Leads, open Discover, choose the project, then enter a kind of business and an area. MyLeadTeam searches Google Places and saves the new companies to that project. A company already saved to the project is skipped.
Research does not start on its own. Use Research on a company, or add it to an AI campaign and it is researched before anything is drafted.
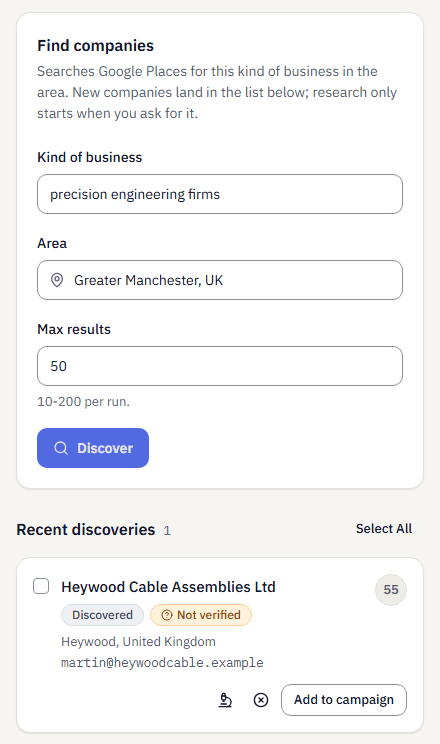
Example workspace. Discover, before a search is run. Each run asks for 10 to 200 companies.Open full size (opens in a new tab) Step 2: Or import your own CSV
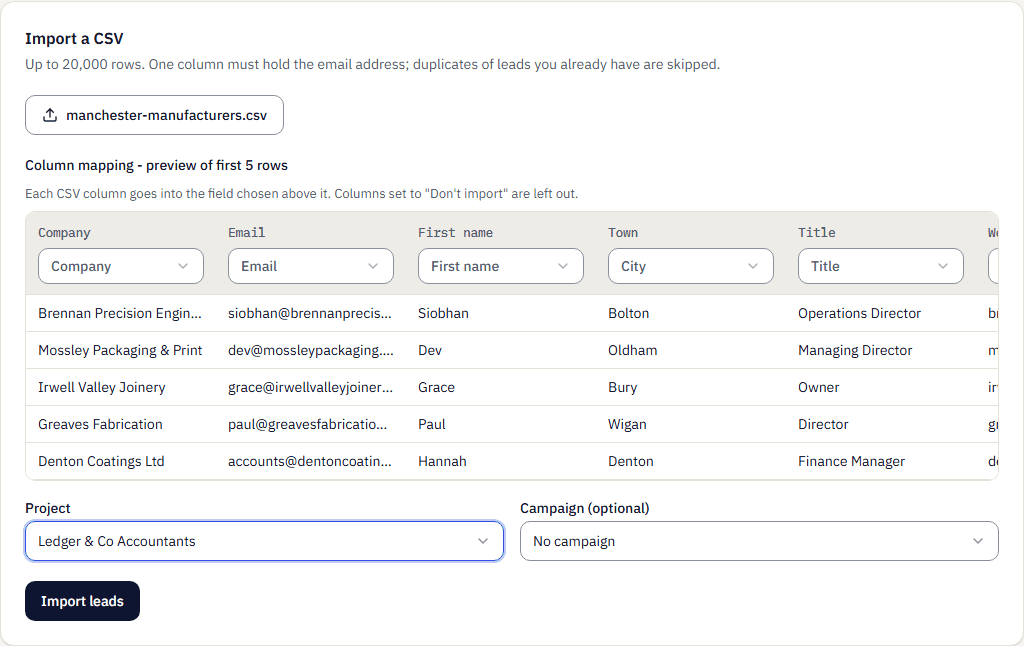
On Leads, choose Add leads, then Choose CSV file. One column must hold the email address, up to 20,000 rows per file. Check the mapping against the preview: a column the app does not recognise is set to Don't import until you pick its field. Choose the project and import.
The result shows how many rows were added and how many duplicates were skipped. Addresses already on your suppression list are imported with a note and blocked when sending.
Worth knowing: Imported companies are not researched automatically, and imported addresses are not verified. Rows enrolled in a campaign from the import screen skip the AI drafting steps, so for an AI campaign import into the project first and add the companies from Leads.
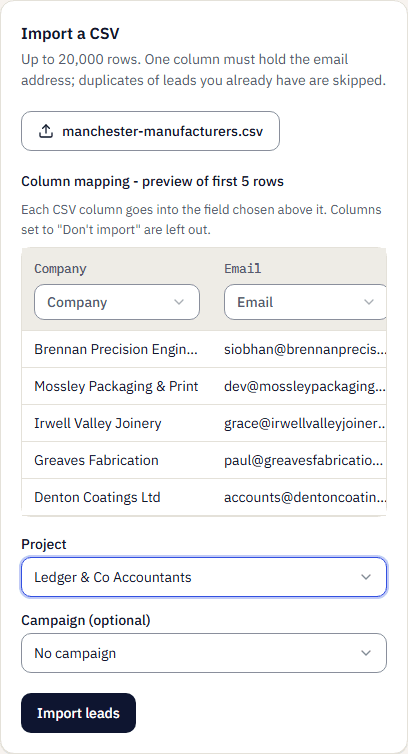
Example workspace. The mapping preview: each CSV column goes into the field chosen above it.Open full size (opens in a new tab) Step 3: Check each address before you rely on it
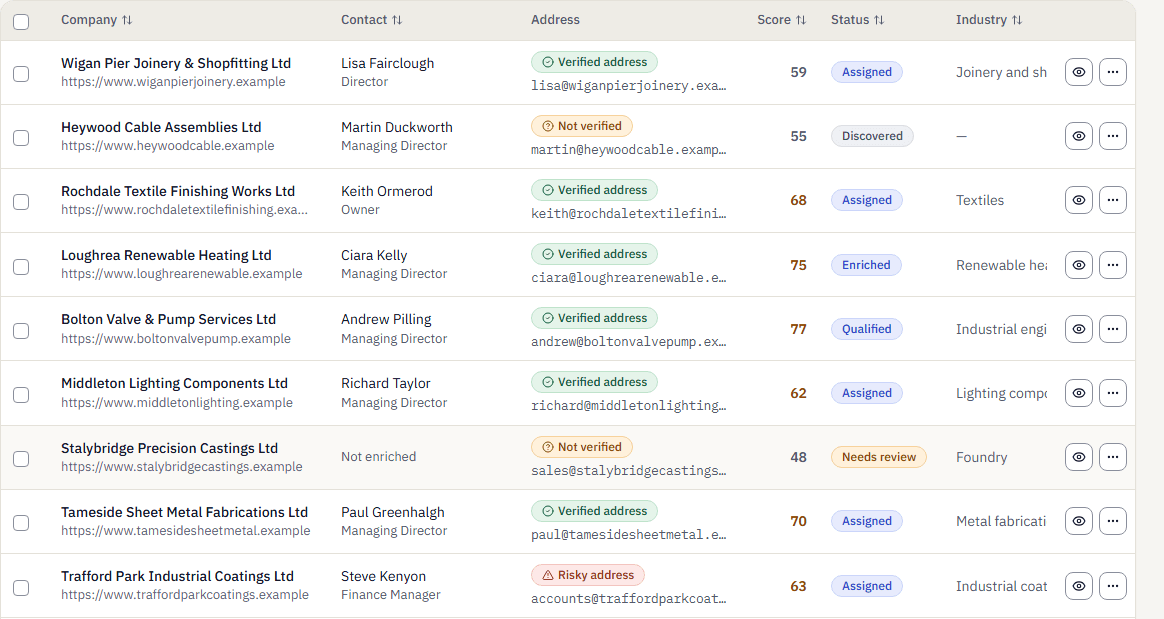
The Address column shows Verified address, Not verified or Risky address. Verified means a check with the receiving mail server confirmed the address. Not verified means nothing confirmed it, which is true of every imported address. Risky means the address was flagged when it was found.
Keep business fit apart from address status. A company that fits well can still have an address that is not verified or risky: that is a reason to look closer, not a sign it is safe to write to.
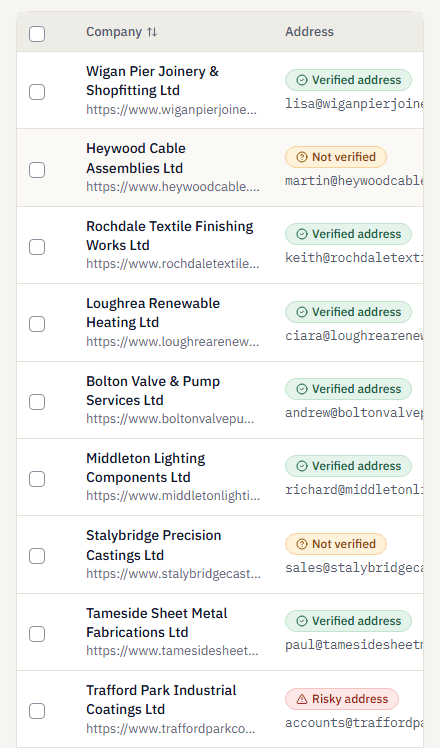
Example workspace. All leads, with the three address statuses side by side.Open full size (opens in a new tab) Step 4: Read what the company publishes, apart from the AI's reading
Select the eye icon (View) on a lead's row to open its panel. Under Published by the company you see what the company states on its own website, with the page and the date it was seen.
Under AI reading, marked Check before use, you see the industry, size, pain points and openings the AI inferred from the pages it read. No single source backs each of those lines. Deep Research, available for any lead with a website, lists the sources it used and any that were unavailable.
Worth knowing: Only facts the company publishes carry a source. Check anything under AI reading before it reaches an email. A lead with no website gets no research.
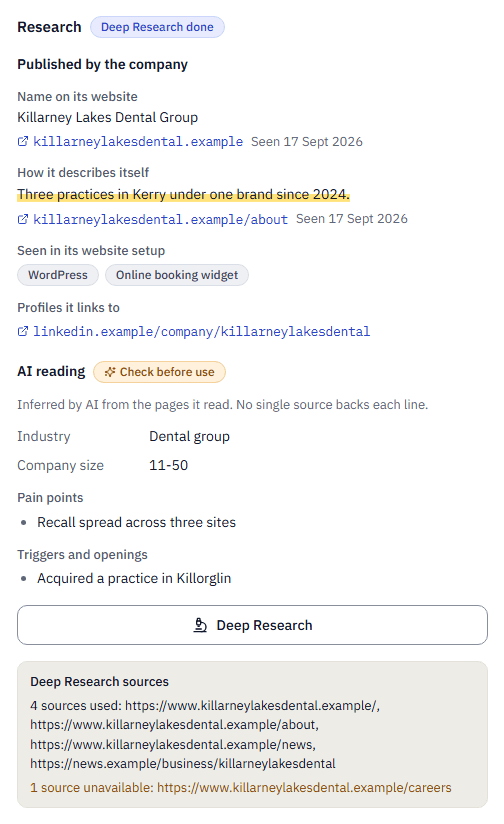
Example workspace. One lead's research: published facts with their pages, then the AI reading to check.Open full size (opens in a new tab)
Next guide, 3 of 4
Review the emails and start
Create a campaign with its sending hours, add companies, read and approve each email in Review, and test the whole loop with an address you own first.
Stuck on a step? Tell us the screen and the message you see. Never include a password.
Ask a question