03Guide 3 of 4
Review the emails and start
In an AI campaign every email waits in Review until someone approves it. Create the campaign, add a few companies, read each draft as the recipient would, then test the loop with your own address.
About 6 minutes · 4 steps · Screenshots from an example workspace with fictional companies
Before you start
- A project with a connected mailbox (see the first guide)
- A few companies whose addresses you have checked (see the second guide)
- An email address you own, for the test
Step 1: Create the campaign
Open Campaigns and choose New campaign. AI-assisted drafts 1 to 3 emails per person for you to review; this guide follows that type. Template is for 1 to 5 steps you write yourself, each with the unsubscribe link.
Set the days between emails and the sending hours: a start time, a stop time and a time zone, for this campaign only. There is no mailbox to pick here. The campaign sends from the mailboxes connected to its project.
Worth knowing: Sending hours use the campaign's time zone, not the recipient's, and weekends are not skipped. Run one campaign per time zone if your list spans several.
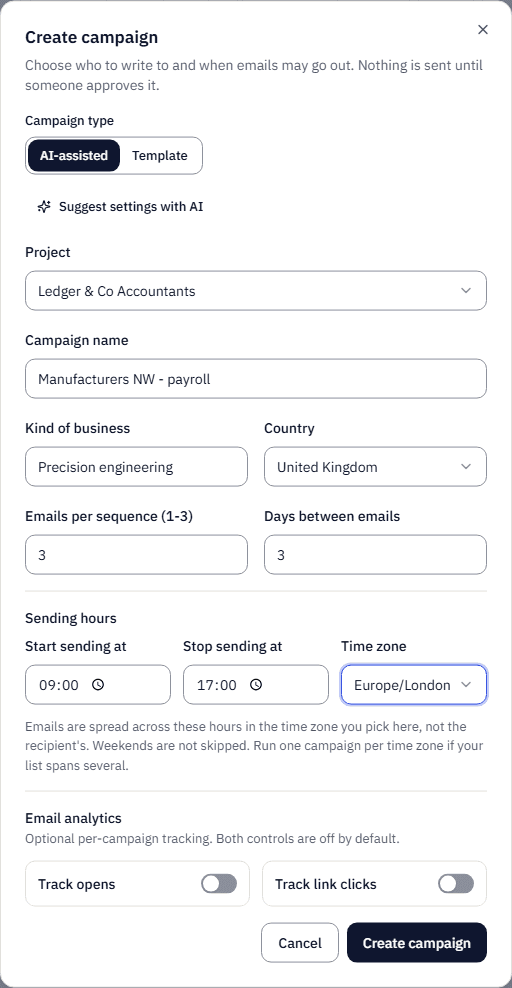
Example workspace. New campaign, AI-assisted, sending between 09:00 and 17:00 London time.Open full size (opens in a new tab) Step 2: Add the companies
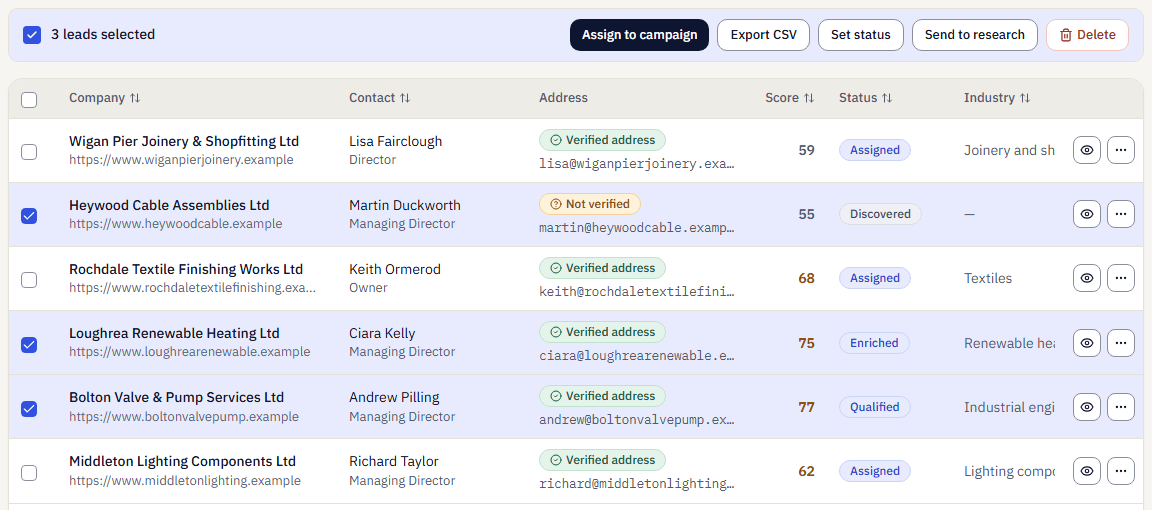
On Leads, tick the companies and choose Assign to campaign. A company found through Discover is researched first, then drafted. An imported company is not researched, so its draft works from the fields you imported, your project profile and Knowledge.
Email 1 is drafted first. Follow-ups are written after the campaign's gap, and each one comes back to Review for its own approval. Then open the campaign and choose Start campaign: its page says what is still missing, such as a mailbox in the project.
Worth knowing: Start the campaign before you approve. Drafts approved while a campaign is not started are moved to Needs review instead of being queued.
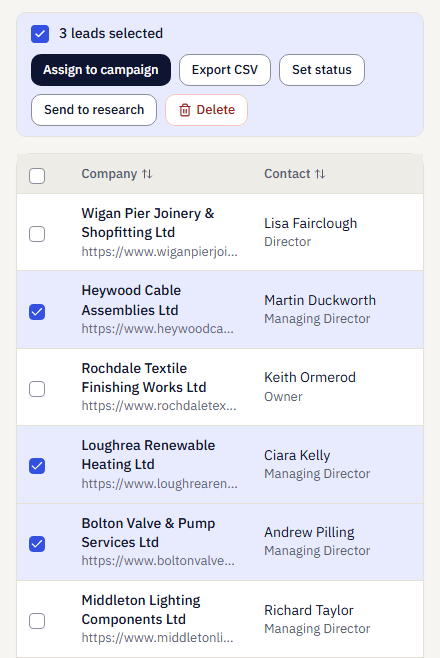
Example workspace. Three companies selected on Leads, ready to assign to a campaign.Open full size (opens in a new tab) Step 3: Read each draft as the recipient would
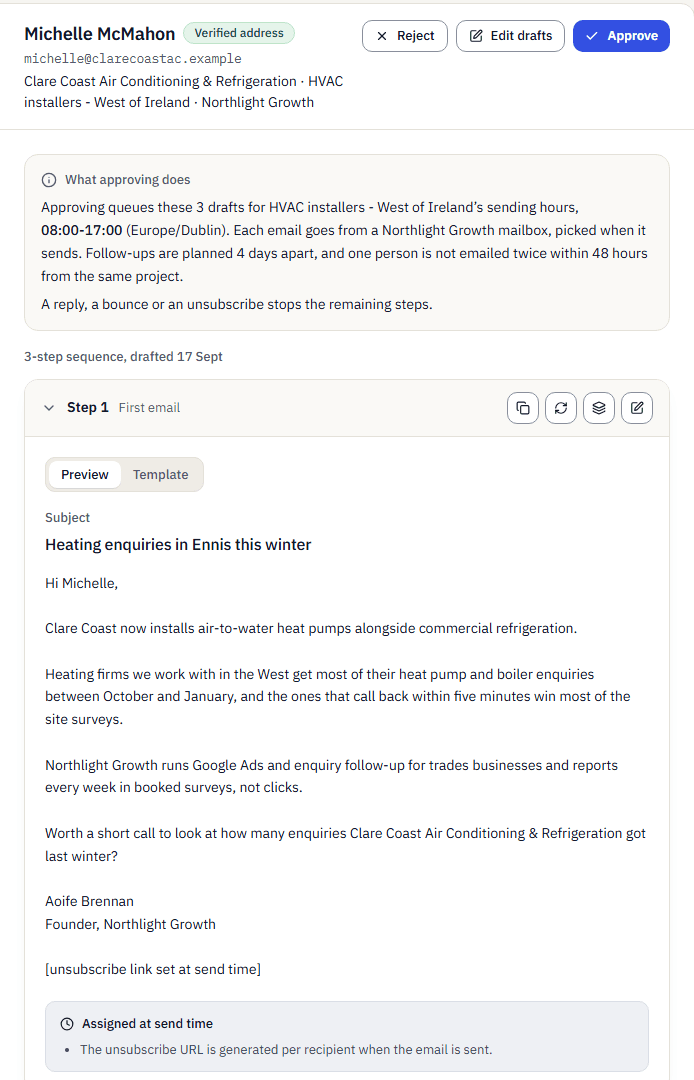
Review lists everyone waiting, grouped by person. Open a group to see the recipient, their address status, the campaign and the full email. Use Edit drafts to change the text, Reject what you would not send and Approve what you would.
"What approving does" spells it out: the email is queued for the campaign's sending hours, the mailbox is picked from the project's mailboxes when it sends, and a reply, a bounce or an unsubscribe stops the remaining steps. Follow-ups normally go from that same mailbox; if it is paused or at its limit, another mailbox of the project sends.
Worth knowing: A draft marked Needs review, for example because it makes claims the research does not back up, is held and is not part of the approval. Queued is not sent: the email goes out within the sending hours.
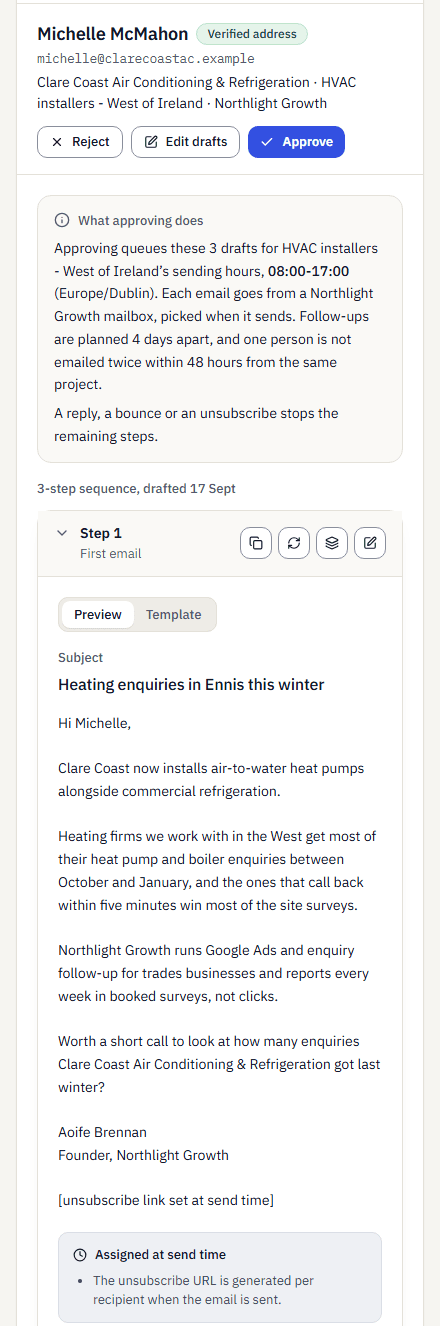
Example workspace. One person's drafts in Review, with what approving will do.Open full size (opens in a new tab) Step 4: Test the whole loop with your own address first
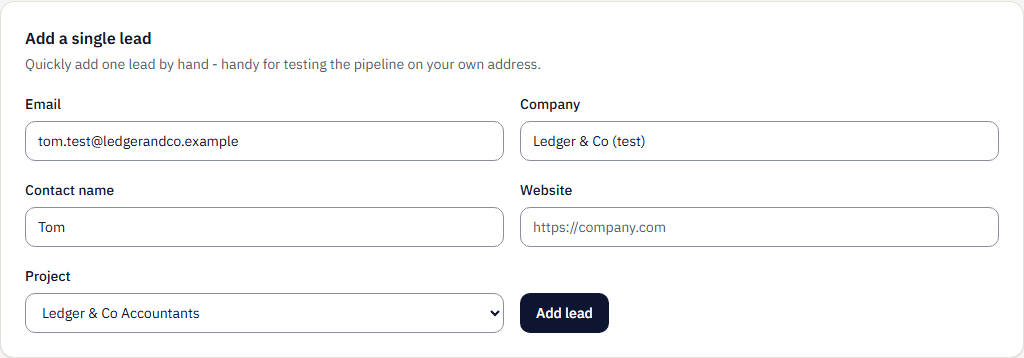
Before a real list, add yourself: on Leads choose Add leads, then Add a single lead with an address you own, in the same project. Assign it to the campaign, approve the draft and let it send within the sending hours.
Read the email where it lands, then reply to it. The reply should appear in Replies within a few minutes, in the right conversation, and no follow-up should reach you. Only then move on to the real list.
Worth knowing: Replies are checked every 5 minutes. If yours does not appear, check the mailbox's IMAP connection. If a send result looks uncertain, look at its history before trying again.
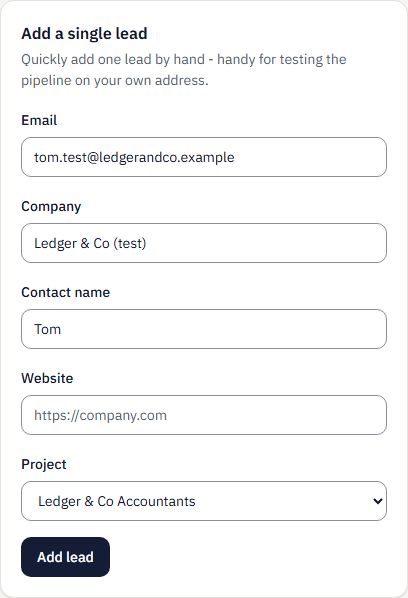
Example workspace. Add a single lead, filled in with a test address the sender owns.Open full size (opens in a new tab)
Next guide, 4 of 4
Handle replies
Read replies and their labels, see which follow-ups a reply stopped, answer from the thread, and how unsubscribes and bounces protect every project.
Stuck on a step? Tell us the screen and the message you see. Never include a password.
Ask a question